Looking for a baked chicken cutlet recipe that’s both crispy and juicy without standing over a hot pan of oil? You’re in the right place. This guide breaks down everything you need to know—from prepping your cutlets like a chef to baking them to golden perfection.
We’ll cover the must-have ingredients, smart tips for breading and baking, plus clever ways to serve and store your chicken. Whether you’re a seasoned cook or just starting out, you’ll walk away knowing exactly how to make an oven-baked chicken that tastes fried but feels way healthier.
Let’s dive right in!
Table of contents
What Makes Baked Chicken Cutlets So Popular?

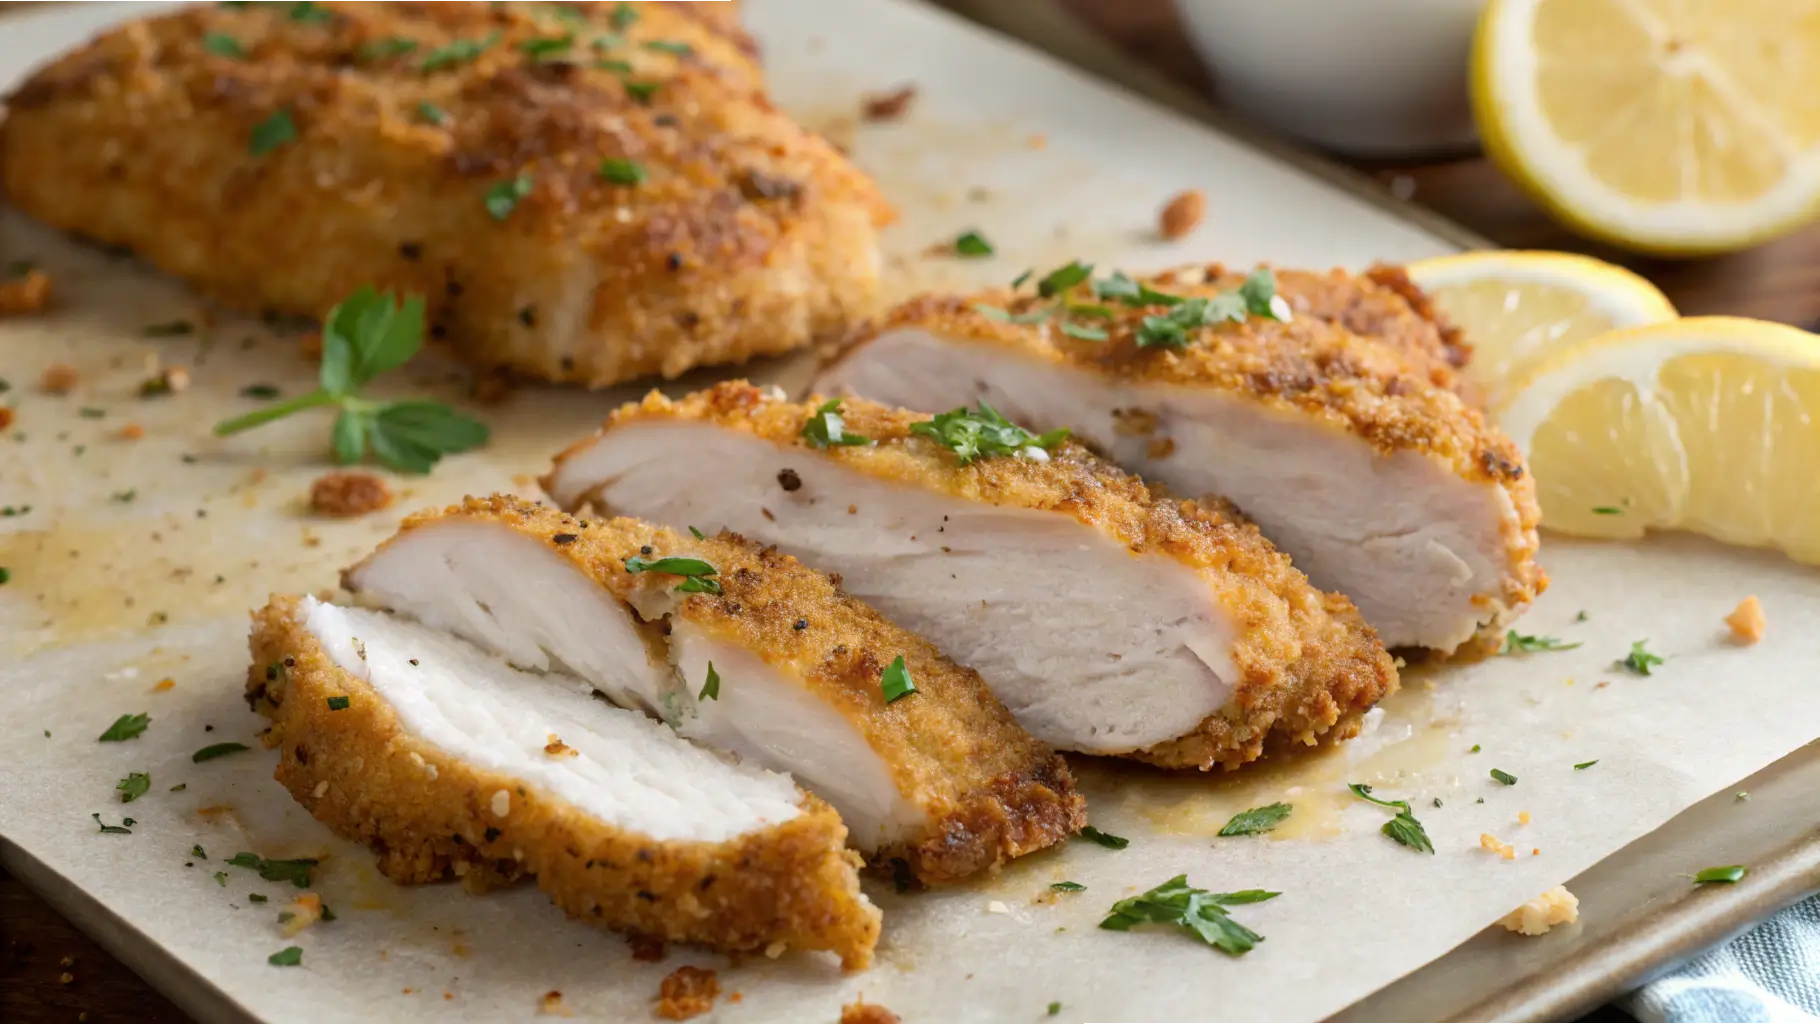
There’s something comforting about biting into a golden, crispy chicken cutlet. But frying can get messy—and heavy. Enter the baked chicken cutlet recipe: all the crunch and flavor, none of the oil splatter or guilt. It’s the perfect balance of crispy on the outside and juicy on the inside.
These cutlets aren’t just a healthier spin on a classic favorite. They’re versatile, easy to prepare, and downright delicious. You can serve them as-is, layer them into a chicken parm, toss them over a salad, or stuff them in a sandwich with some spicy broccoli rabe and melty provolone. The sky’s the limit.
Plus, baking keeps things lighter, cleaner, and simpler. No babysitting oil temperatures or dealing with the aftermath of a greasy kitchen. Just pop ’em in the oven and let the magic happen. Yup, this is one recipe you’ll want on repeat.
Ingredients for the Best Baked Chicken Cutlet Recipe
Essential Ingredients Breakdown
To make the perfect baked chicken cutlet recipe, start with the basics. You don’t need anything fancy—just fresh, quality ingredients and a few pantry staples.
Here’s what you’ll need:
- Boneless, skinless chicken breasts – These are lean, tender, and ideal for slicing into cutlets.
- Eggs – They help the breadcrumb coating stick and add richness.
- Milk – A splash of milk makes the egg mixture smooth and creamy.
- Seasoned breadcrumbs – Go for Italian-style, or better yet, make your own. Combine plain breadcrumbs with pecorino cheese, dried oregano, garlic powder, onion powder, and a touch of black pepper.
- Grated cheese – Pecorino Romano or Parmesan adds a deep, nutty flavor that makes each bite irresistible.
- Fresh parsley – Adds a pop of color and freshness.
- Cooking spray or oil – Use avocado oil, light olive oil, or any high-smoke-point oil to help the cutlets crisp up beautifully in the oven.
Using high-quality spices and cheese makes a huge difference. If your spices smell dusty or dull, it’s time to toss ’em. Fresh ingredients = full flavor.
Best Chicken to Use: Breasts vs. Thighs vs. Pre-cut Cutlets
For most, chicken breasts are the top choice for a classic baked chicken cutlet recipe. They’re easy to work with and turn out tender when sliced and pounded thin.
But hey, don’t count out boneless thighs—they’re juicier and bring a slightly richer flavor. If you’re short on time, pre-sliced cutlets from the store can save you a step. Just make sure they’re thin and even for the best results.
Prepping the Chicken Like a Pro
How to Slice Chicken Breasts into Cutlets
Getting your chicken just right is key to a successful baked chicken cutlet recipe. If you’re starting with whole chicken breasts, you’ll want to slice them horizontally. Use a sharp knife and place your hand flat on top of the meat. Then, carefully cut across to create two thinner pieces. This technique ensures even cooking and makes the breading process easier.
Not comfortable slicing? No problem—pop the chicken in the freezer for 15–20 minutes first. Slightly frozen meat is firmer and easier to cut. Still not confident? Grab pre-sliced cutlets from your butcher or grocery store and save yourself some prep time.
Why Pounding Matters: Tips for Uniform Thickness
Once your cutlets are sliced, it’s time to pound. Don’t skip this step! Even thickness means your chicken will cook evenly, staying juicy inside and crisp outside.
Place each cutlet between two sheets of plastic wrap or parchment paper. Use a meat mallet, rolling pin, or even a heavy pan to gently pound them to about ½ inch thick. Be careful not to overdo it—you want flat, not shredded.
While you’re at it, give them a light sprinkle of salt and pepper. That small touch boosts flavor before any breading even happens. From here, your cutlets are ready for the egg wash and breadcrumb magic.
Taking the time to prep your chicken properly really sets this baked chicken cutlet recipe apart from the rest. It’s these small steps that lead to that golden, restaurant-quality crunch at home.
Creating the Perfect Breading Station
Step-by-Step Setup of Wet and Dry Stations
Let’s face it—breaded chicken can get messy. But with a smart setup, the process becomes simple and even kind of fun. For this baked chicken cutlet recipe, you’ll need two main stations: one wet, one dry.
Start with a wide bowl or shallow dish for your wet mix. Crack two eggs, add a splash of milk, toss in some grated cheese, and whisk it all together. This mixture gives the chicken a rich coating that helps the breadcrumbs stick.
Next, prepare your breadcrumb station. In another shallow dish, mix your seasoned breadcrumbs with dried herbs, garlic powder, onion powder, and finely grated cheese. Stir well, so every bite is packed with flavor.
Arrange your workspace like an assembly line: raw chicken → egg wash → breadcrumb mix → baking tray. Use one hand for wet and one for dry to avoid the dreaded “breadcrumb gloves” on your fingers!
Using parchment paper on your baking tray makes cleanup easier, and a light oil spray on both the tray and cutlets helps create a crispy crust in the oven.
Seasoning Tips for Breadcrumbs
Here’s where you can really make this baked chicken cutlet recipe your own. Boost flavor by mixing in Italian seasoning, smoked paprika, lemon zest, or even a touch of cayenne for heat.
And don’t forget the cheese! Parmesan or pecorino romano adds a savory, umami-rich depth that you’ll taste in every crunchy bite.
Craving more bold chicken dishes? Try this Street Corn Chicken Rice Bowl—packed with smoky, tangy flavor in every bite.
Baking Your Chicken Cutlets to Crispy Perfection
Oven Temperature and Rack Placement for Maximum Crisp

Time to bake it till it’s golden. Preheat your oven to 425°F. This high heat is crucial—it mimics the quick sizzle of frying without the oil. For best results, place the rack in the lower third of your oven. This allows more direct heat to hit the bottom of your chicken, helping that crust get crisp and toasty.
Once your breaded cutlets are on a parchment-lined baking sheet, give them a good spray of oil on top. This isn’t the time to skimp! That extra bit of oil ensures your baked chicken cutlet recipe doesn’t turn out dry or pale.
Bake for 15 minutes, flip gently, and bake for another 10–12 minutes. Want even more crunch? Pop them under the broiler for 1–2 minutes at the end—but don’t walk away! They can go from golden to burned fast.
When and How to Flip for Even Cooking
Flipping matters. You’ll want to wait until the breadcrumbs on the bottom are set and lightly browned. If you try to flip too early, the coating might stick or fall off.
Use a thin spatula or tongs and gently turn each cutlet. Be careful not to tear the coating—this keeps that oven-baked chicken looking and tasting like it came out of a skillet.
After baking, let the cutlets rest for a few minutes. This helps the juices redistribute and keeps the crust crispy instead of soggy.
Serving Suggestions and Meal Ideas
Classic Chicken Parmigiana
One of the best things about this baked chicken cutlet recipe is how versatile it is. First up—chicken parmigiana. Just layer the crispy cutlets in a baking dish, spoon on your favorite marinara, and top with mozzarella and parmesan. Pop it back in the oven for 10 minutes until everything’s hot and bubbly. Serve it with spaghetti or garlic bread, and dinner’s done!
If you’re looking for more baked pasta pairings, this baked chicken fettuccine alfredo with broccoli is the perfect creamy match for your golden cutlets.
Chicken Cutlet Sandwich Variations
Feeling sandwich vibes? Stack a cutlet on a toasted roll with lettuce, tomato, and a swipe of garlic mayo. Or get creative—try roasted red peppers, melted provolone, or even some broccoli rabe for a spicy twist.
Cutlets also work great sliced over a crisp salad or tucked into a wrap with your favorite sauce. You could even turn them into sliders for game day. No matter how you serve them, these cutlets steal the show.
Want bold flavor in bowl form? Pair your cutlet with this Chicken Meatball Soup for a smoky, zesty combo.
Storage, Freezing, and Reheating Tips
Best Practices for Refrigerating and Freezing
Got leftovers? Great! This baked chicken cutlet recipe is just as handy the next day. Store cooked cutlets in an airtight container in the fridge for up to 5 days. If you’re thinking longer term, freeze them in a single layer on a baking sheet first. Once they’re solid, transfer them to a freezer-safe bag or container. They’ll stay good for up to 3 months.
To avoid soggy breading, skip the microwave. Instead, reheat in the oven or toaster oven at 350°F for 10–15 minutes. This brings back the crunch without drying the chicken out.
Make-Ahead Strategies for Busy Weeknights
Want to prep ahead? Bread your cutlets and refrigerate them raw for up to 24 hours before baking. This way, when dinner time rolls around, you’re ready to go—just bake and serve.
Looking for more comfort food ideas? You’ll love this cozy smothered chicken and rice recipe—it’s pure Southern-style satisfaction on a plate.
Common Mistakes and Expert Fixes
Cutlets Not Crispy? Here’s Why
So you followed the baked chicken cutlet recipe, but your cutlets came out soft or soggy? Don’t worry—it happens. The most common culprit? Not enough oil. Even though this dish is baked, the breadcrumbs need a little fat to brown and crisp. A quick spray of oil on both sides before baking goes a long way.
Also, placing the chicken too close together on the pan can cause steaming instead of roasting. Always use a large tray or bake in batches to give each piece room to breathe.
How to Avoid Overcooked or Dry Chicken
Dry chicken is a total buzzkill. But it’s easy to avoid! First, make sure your cutlets are evenly pounded to ½ inch thick. Uneven pieces cook unevenly—some parts may dry out before others are done.
Second, don’t overbake. Stick to the cooking time, and use a meat thermometer. Once your cutlets hit 165°F, they’re perfect. Any longer and you risk drying them out.
FAQs
What is the best way to cook chicken cutlets?
That depends on your goal! If you’re looking for a healthier, low-mess option, the baked chicken cutlet recipe is the clear winner. It delivers crispy texture without deep frying, and cleanup is a breeze. But if you’re after extra crunch and don’t mind the oil, pan-frying gives unbeatable crispness in less time.
Do you dip cutlets in egg or flour first?
In this recipe, you’ll skip the flour altogether. While the classic breading method uses flour first, followed by egg, then breadcrumbs, this baked chicken cutlet recipe skips the flour for a lighter coating. The egg mixture—combined with milk and cheese—does a great job helping the breadcrumbs stick.
Is it better to fry or bake breaded chicken?
Honestly, it’s a matter of preference. Frying gives that deep crunch and rich flavor, but it comes with extra calories, grease, and a messy kitchen. Baking, especially at high heat, delivers nearly the same crispiness with far fewer downsides. Plus, baked chicken stores and reheats better—making it perfect for meal prep.
What goes best with chicken cutlets?
So many things! Pair your cutlets with pasta, mashed potatoes, roasted veggies, or a crisp salad. Or get creative—try them in sandwiches, rice bowls, or wraps. Looking for a hearty match? This chicken meatball soup or smothered chicken and rice pairs beautifully for a filling dinner.
How long to cook breaded chicken in the oven?
Bake at 425°F for 25–30 minutes, flipping halfway through. The goal is a crispy outside and a juicy inside. Use a meat thermometer to be sure—they’re done when the internal temperature reaches 165°F.
Why does breading fall off fried chicken?
A few reasons! Sometimes the chicken isn’t dry enough before breading, or the breadcrumbs weren’t pressed in firmly. With this baked chicken cutlet recipe, make sure the cutlets are patted dry and coated well in egg before pressing into the breadcrumb mix. Also, avoid flipping too early—that’s when most of the coating comes loose.
Conclusion
The baked chicken cutlet recipe is the perfect blend of comfort, crispiness, and convenience. It brings all the satisfaction of a classic breaded chicken dish—without the mess or heaviness of frying. With just a few pantry staples, a smart baking method, and a handful of pro tips, you can whip up cutlets that are golden on the outside and juicy inside every single time.
Whether you’re serving them as the main dish, layering them into a sandwich, or turning leftovers into a next-day meal, this recipe is a keeper. So go ahead—make a double batch. Your future self will thank you.
Print
Crispy Baked Chicken Cutlets
- Total Time: 40 minutes
- Yield: 4 cutlets 1x
Description
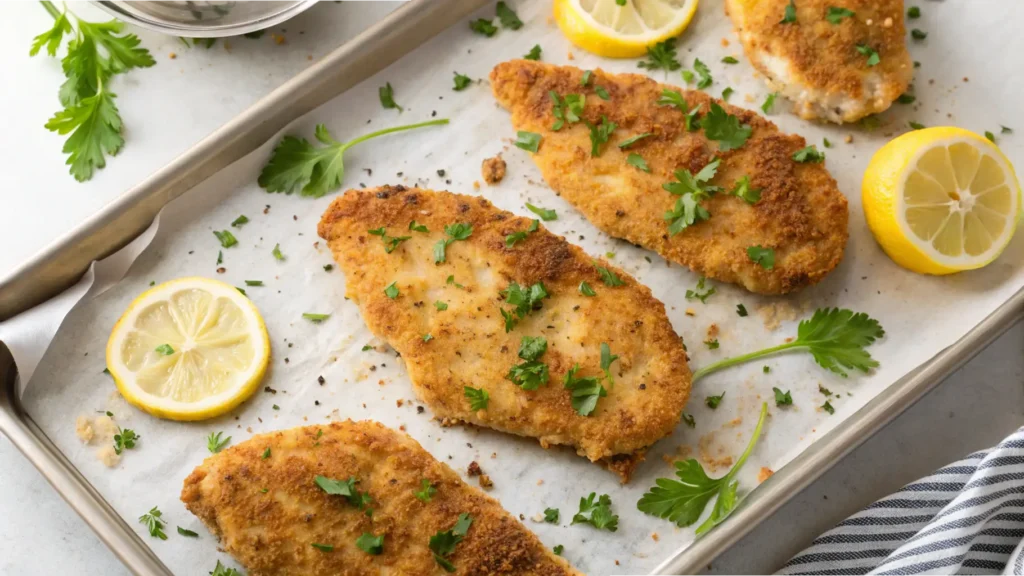
Skip the frying pan and still get that irresistible crunch with these Crispy Baked Chicken Cutlets. Juicy on the inside and golden on the outside, this healthier version of a classic delivers big on flavor without the mess or extra oil. Perfect for busy weeknights, meal prep, or crowd-pleasing dinners, these oven-baked cutlets are versatile, easy to make, and endlessly delicious.
Ingredients
-
2 large boneless, skinless chicken breasts (or 4 thin-sliced cutlets)
-
2 large eggs
-
2 tablespoons milk
-
½ cup grated Pecorino Romano or Parmesan cheese (divided)
-
1 ½ cups seasoned Italian breadcrumbs
-
1 teaspoon garlic powder
-
1 teaspoon onion powder
-
1 tablespoon dried parsley (or 2 tablespoons fresh chopped parsley)
-
½ teaspoon black pepper
-
Salt, to taste
-
Cooking spray or light olive oil for baking
-
Optional: ½ teaspoon smoked paprika or Italian seasoning for extra flavor
Instructions
-
Prep the Chicken: If using whole breasts, slice them horizontally to create thin cutlets. Place between plastic wrap and pound to about ½-inch thickness. Season both sides lightly with salt and pepper.
-
Set Up the Breading Station: In a shallow bowl, whisk together eggs, milk, and 2 tablespoons of grated cheese. In another dish, combine breadcrumbs, remaining cheese, garlic powder, onion powder, parsley, and black pepper.
-
Bread the Cutlets: Dip each cutlet into the egg mixture, allowing excess to drip off, then press into the breadcrumb mix, coating both sides well.
-
Arrange for Baking: Line a baking sheet with parchment paper and spray with oil. Place breaded cutlets on the sheet and spray tops generously with cooking spray or drizzle with oil.
-
Bake: Preheat oven to 425°F (220°C). Place the tray on the lower third rack and bake for 15 minutes. Flip cutlets carefully, then bake for another 10–12 minutes until golden and cooked through.
-
Optional Broil: For extra crispiness, broil for 1–2 minutes—watch closely!
-
Serve: Let cutlets rest for 5 minutes before serving. Enjoy as-is or in sandwiches, salads, or chicken parmigiana.
Notes
- Want to prep ahead? Bread the cutlets up to 24 hours in advance and refrigerate until ready to bake.
- Store leftovers in an airtight container in the fridge for up to 5 days or freeze for 3 months. Reheat in a 350°F oven for 10–15 minutes.
- Serve with pasta, roasted veggies, or layer into a sandwich with melted provolone and broccoli rabe for a bold twist.
- Prep Time: 15 minutes
- Cook Time: 25 minutes
- Category: lunch
- Cuisine: American / Italian-inspired
Nutrition
- Calories: 310 kcal
- Fat: 12g
- Carbohydrates: 20g
- Protein: 28g